Showing posts with label Halloween. Show all posts

Wednesday, September 5, 2012

Double sided 2x8

I have high hopes that Fall will be hitting my part of the country soon. We're still hitting triple digits each day, but our evenings are just barely making it to bearable.

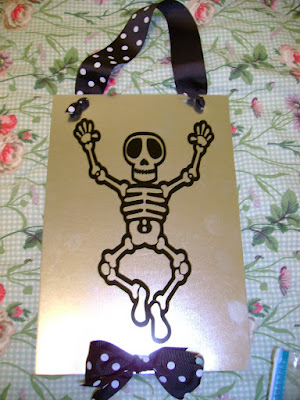
So on the thoughts of Fall I decided to make a new Halloween craft. I had some scrap 2x8 that I white washed with watered down craft paint and made a festive Halloween design. Who doesn't like a cute skeleton!

But there is a backside to the wood that is just a great as the front. Why leave it blank when I can just as easily make it a Christmas decoration? I love the Hymn "I Heard the Bells on Christmas Day" and decided to put part of that hymn on the back.


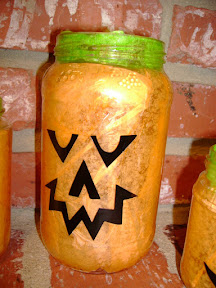
Happy Fall decorating!


Somewhat Simple Photobucket

Friday, September 24, 2010

Fall Frames

I've seen similar projects floating around blogland and decided to try my hand at my own. Here's what you need to make this project:


  • 4 mismatching frames (mine were a mix of 3x5, 4x6 and 5x7 frames from the Dollartree)

  • Spray paint (I used black)

  • Die Cut letters (I used black vinyl)

  • Scrapbook paper

  • Any wanted embellishments


I started out by removing the backs and glass from all of the frames, getting them ready to be spray painted:


Then they got a couple of coats of black spray paint:


Next I picked my scrapbook papers and cut them to size. I used scraps that I had in Fall colors. I also cut my letters to spell "FALL"


After applying the letters I added some ribbon and buttons to jazz up the frames:


And the final product on my piano.


For now I have fall leaves as well as my "Jar Jack-o-Lanterns"

I could see making this same project spelling a variety of words like Winter and Spring. I think Love or Lucky would be cute too!


giveaways


idea room

Tuesday, September 14, 2010

Ribbon Wreath~FALL

I am so ready for Fall to be here and HOT temperature to be out the door!! Fall decorations are going to start going up around here and I'm starting with a wreath! I was inspired by a wreath I saw over at Tatertots and Jello, but changed it up a bit for myself!

Here's what you need to get yourself started:


  • 12" foam wreath (check out your local Dollartree)

  • 3 yards of a wide ribbon

  • loads of ribbon (I went with a Fall theme~orange, yellow, red, green) cut into 4" peices

  • straight pins

  • any embellishments you want to add


First I wrapped my foam wreath with my wide ribbon. I used 2 straight pins to hold it in place and then wrapped it all the way around, finishing with 2 more straight pins:


Then I made a loop with one piece of ribbon and put a straight pin through it.


Then I added anywhere from 2 to 4 more ribbons and pinned them onto the wreath:

Continue to add bunches of ribbons, mixing your colors and adjusting your loops to cover the front of the wreath:

Take a longer piece of ribbon (about 12" inches) and pin into place as a hanger:

Finish adding your ribbons and then add some embellishments. I found some plastic acorns at the Dollartree:

I randomly glued them throughout my wreath:

Hang on your door and enjoy!

I love how it turned out and look forward to getting the rest of my Fall decor out!
I plan on trying out another type of ribbon wreath in a Halloween or Christmas theme, check it out at The Long Thread!


I'm linking up here over atShow and Tell Green


Creations by Kara giveaways

Sunday, September 12, 2010

Jar Jack-o-Lanterns


When do you put your fall decorations out? I'm in the midst of doing some fall crafts and am about ready to start bringing them out. I found a fun new jack o lantern craft that I just had to try here's where I found it: Not so idle hands


I changed up the tutorial a little bit for myself.

  • First find some old, clean jars (spaghetti, baby food), whatever you have on hand.

  • Then cut 1 inch strips of orange tissue paper

  • Coat 1/2 of the inside of your jar with modge podge

  • carefully place your strips in the jar and smooth up the sides (it's a little messy!)

  • Be sure your strips don't cover the top lip of the jar.

  • Then cut some a little green tissue paper and coat the upper rim on the jar and apply the green tissue paper

  • Let it dry!

  • Apply vinyl jack-o-lantern faces to the fronts of you jars

  • I used battery operated tea lights found at the Dollartree to light my jars.


Here's another set of instructions if you want to make a set of your own: http://www.instructables.com/id/Recycled_Jar_Jack_OLanterns/
Here are a few other fall/Halloween things: